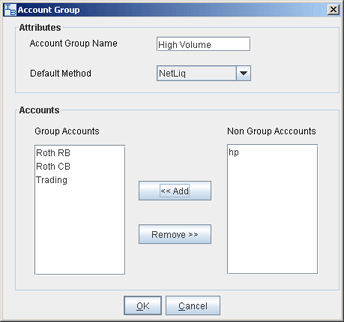
Create an Account Group for Share Allocation
You can use an Account Group to automatically calculate ratios and allocate order shares to a pre-defined group of accounts based on a selected allocation method. When you create an order and choose a group, the order uses the default method to allocate shares amongst the accounts in the group.

To create an Account Group
On the Configure menu, select Advisor, then select Account Groups, and click Create.
Enter an Account Group name. Do not use the name "All" since this is reserved by the system.
Note that when you create an order, the choices displayed in the Allocation list are grouped first by Account Groups, then Allocation Profiles, and then individual accounts. However, they are not identified in any other way. When you create an account group, you may want to include a prefix such as "AG" in the name to identify the choice as an Account Group.
Select a default allocation method. You can change the allocation method for each order.
EqualQuantity
- Requires you to specify an order size. This method distributes shares
equally between all accounts in the group.
Example: You transmit an order for 400 shares of stock ABC. If
your Account Group includes four accounts, each account receives 100 shares.
If your Account Group includes six accounts, each account receives 66
shares, and then 1 share is allocated to each account
until all are distributed.
NetLiq
- Requires you to specify an order size. This method distributes shares
based on the net liquidation value of each account. The system calculates
ratios based on the Net Liquidation value in each account and allocates
shares based on these ratios.
Example: You transmit an order for 700 shares of stock XYZ. The
account group includes three accounts, A, B and C with
Net Liquidation values of $25,000, $50,000 and $100,000 respectively.
The system calculates a ratio of 1:2:4 and allocates 100 shares to Client A,
200 shares to Client
B, and 400 shares to Client C.
AvailableEquity
- Requires you to specify an order size. This method distributes shares
based on the amount of equity with loan value currently available in each
account. The system calculates ratios based on the Equity with Loan value
in each account and allocates shares based on these ratios.
Example: You transmit an order for 700 shares of stock XYZ. The
account group includes three accounts, A, B and C with available equity
in the amounts of $25,000, $50,000 and $100,000 respectively. The system
calculates a ratio of 1:2:4 and allocates 100 shares to Client
A, 200 shares to Client B,
and 400 shares to Client
C.
PctChange
- Do not specify an order size. Since
the quantity is calculated by the system, the order size is displayed
in the Quantity field after the order is acknowledged. This method
increases or decreases an already existing position. Positive percents
will increase a position, negative percents will decrease a position.
|
BUY ORDER |
Positive Percent |
Negative Percent |
|
Long Position |
Increases position |
No effect |
|
Short Position |
No effect |
Decreases position |
|
SELL ORDER |
Positive Percent |
Negative Percent |
|
Long Position |
No effect |
Decreases position |
|
Short Position |
Increases position |
No effect |
Example 1: Assume that
three of the six accounts in this group hold long positions in stock XYZ.
Client A has 100 shares, Client B has 400 shares, and Client
C has 200 shares. You want to increase their holdings by 50%, so
you enter "50" in the percentage field. The system calculates
that your order size needs to be equal to 350 shares. It then allocates
50 shares to Client A, 200 shares to Client B, and 100 shares to Client
C.
Example 2: You want to close out all long positions for three of the five
accounts in a group. You create a sell order and enter "-100"
in the Percentage field. The system calculates 100% of each position for
every account in the group that holds a position, and sells all shares
to close the positions.
The list of accounts in the Non Group Account section includes all accounts available to you. To add an account to the group, select a Non Group account and click Add.
Click OK to save the group and its settings.