The allocation screen is composed of two sections. The top displays the day’s trades that have been allocated or are available for allocation. This section is color-coded for quick reference as follows:
| Color | Description |
|---|---|
| Yellow | Trades are unallocated. |
| Blue | Trade has been partially allocated. |
|
Green |
Trade is completely allocated. |
| Lavender | Identifies legs for an Average Price trade. |
The check box at the beginning of each line is used to select the trade for post-trade allocation; to unallocate if the trade has already been allocated, and to create an average price trade.
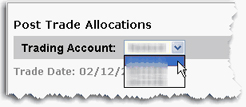
If you have several trading accounts, you must select a single account of interest from the Trading Account list, which appears as shown below. If you do not have several trading accounts, the Trading Account list does not display.
The trading accounts are sorted by color in the Trading Account list as follows:
| Color | Description |
|---|---|
| Yellow | Trades for the account are unallocated. |
|
Blue |
Some trades for the account have been allocated. |
|
Green |
All trades for the account have been allocated. |
|
White |
There are no available trades for this account. |
The bottom section includes a list of approved clearing brokers defined for the account, and provides entry fields where you enter the percent of each trade you want to allocate.
You must define an Odd Lots recipient to which odd lot allocation amounts will be sent.
The Allocation review window pictured above has two display modes: Accounts as Columns (default) and Accounts as Rows (shown above). Change the display mode by clicking the Flip Display button at the top of the allocation data. Change the default display mode using the Configuration page.
To make the post trade allocation process easier and more efficient, create re-usable allocation templates from the Configure page.
To allocate trades using a template